A registration form is only the first step. After someone signs up, you may need to add that person to a CRM, save the record in Google Sheets, send a team alert, or start an email sequence.
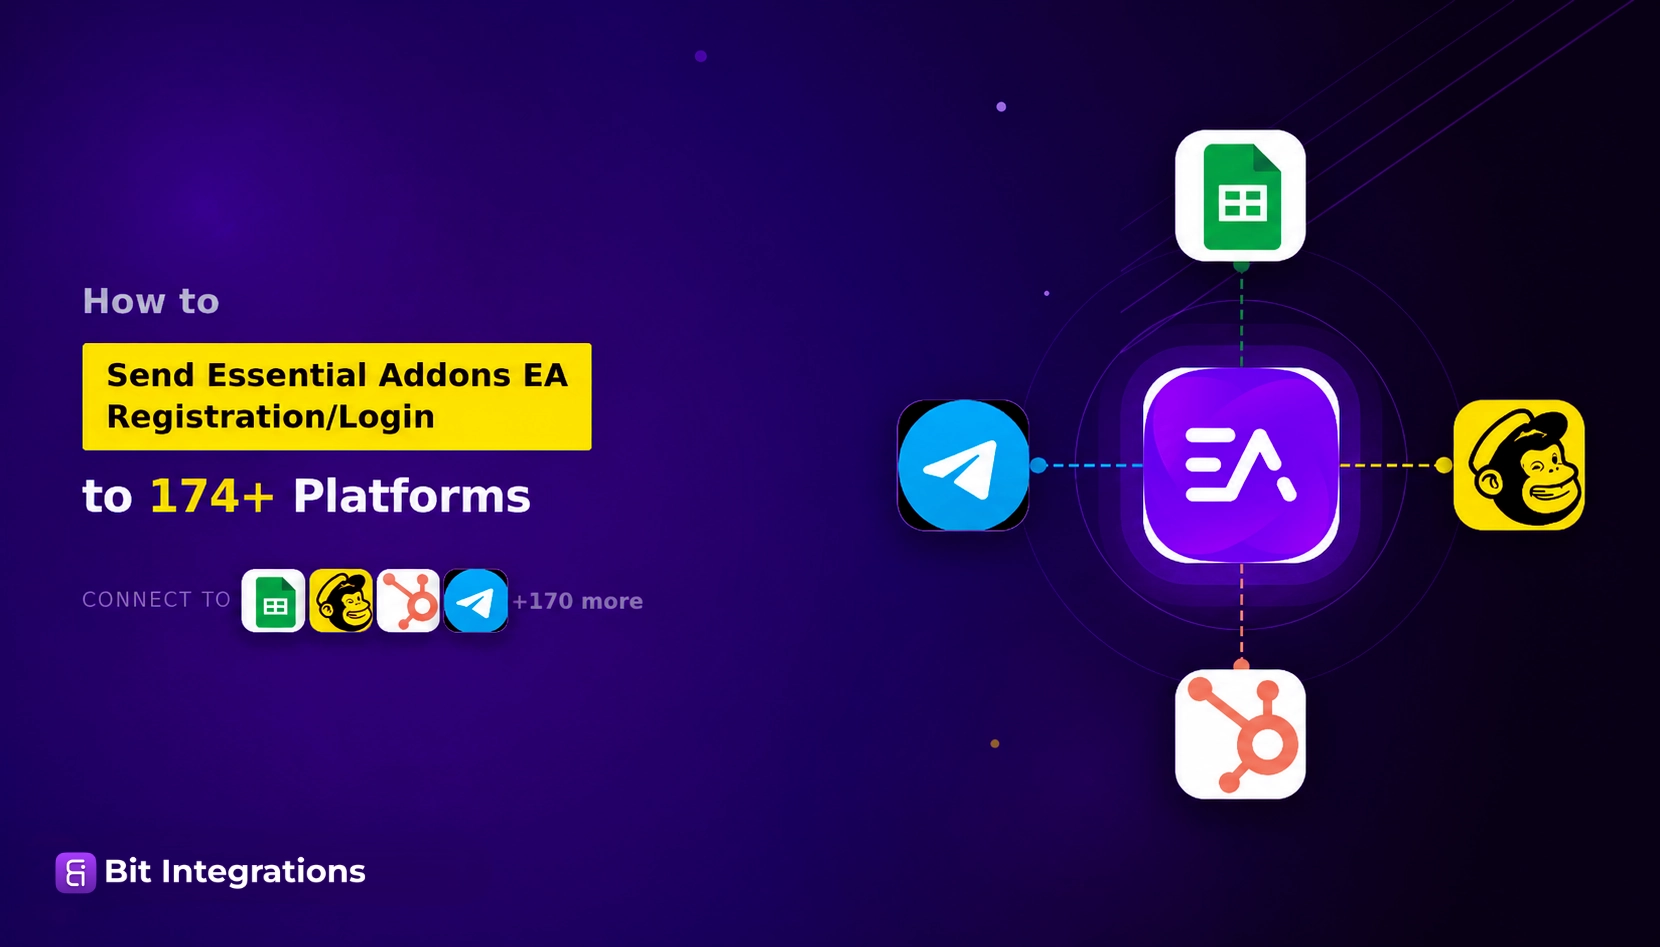
Essentiële addons voor Elementor helps you create login and registration forms. Bit Integrations handles the next step by sending that registration or login data to tools like HubSpot, Mailchimp, Google Sheets, Telegram, and other connected platforms.
Essential Addons for Elementor Login and Registration forms let users sign up or log in on your WordPress site. Bit Integrations syncs those form submissions with your favorite tools, so when someone registers, their mapped details can be sent automatically to HubSpot, Mailchimp, Google Sheets, Telegram, and 173+ other platforms, without writing code.

Essentiële addons voor Elementor is a WordPress plugin that adds extra widgets, extensions, and design elements to the Elementor page builder. It gives users more options for building pages without writing custom code.
With Essential Addons, you can add elements like post grids, advanced accordions, testimonials, creative buttons, pricing tables, WooCommerce widgets, and login/register forms. Its Login | Register Form widget lets site owners create frontend login and registration forms directly inside Elementor.
In this workflow, Essential Addons handles the form design and frontend user submission. Bit Integrations handles the next step by sending the registration or login data to other tools, such as CRMs, email platforms, spreadsheets, or team notification apps.
Bit Integrations supports Essential Addons as a trigger, with two events:
Once the trigger runs, Bit Integrations captures the available user data. Then you choose the destination app, connect your account, map the fields, and save the integration.
Opmerking: In this guide, login data means user event data such as email, username, role, display name, and login timestamp. It does not refer to passwords.
The setup process is the same regardless of which platform you’re connecting to. Here’s the simple flow:
Make sure you have these in place:
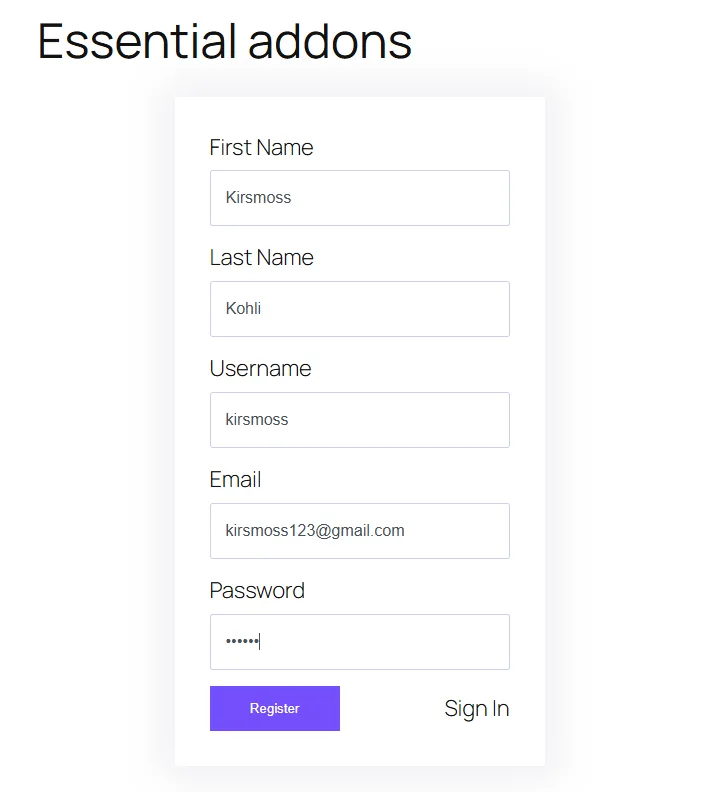
If you haven’t set up the EA form yet, add the EA Login | Register Form widget to your page via the Elementor editor, then switch the form type to Registration or Login from the widget’s Content tab.
Go to WordPress Dashboard → Plugins → Add New, search for “Bit Integrations”, install and activate it.
If you want more setup details, the Essential Addons integration documentation gives you the complete process in one place.
From the Bit Integrations dashboard, click Integratie maken. This opens the trigger selection screen.
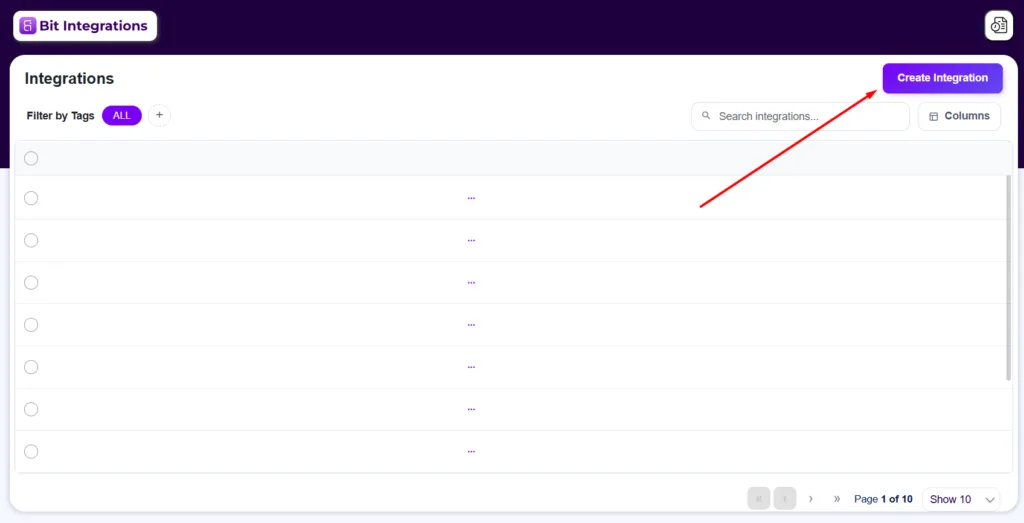
Search for Essential Addons in the trigger list and select it. Then choose your event, either Gebruikersregistratie of User Login, depending on which form you want to track.
After choosing the trigger event, click on the fetch button, and submit a test registration or login. When Bit Integrations fetches the submitted data then goes to the next steps.

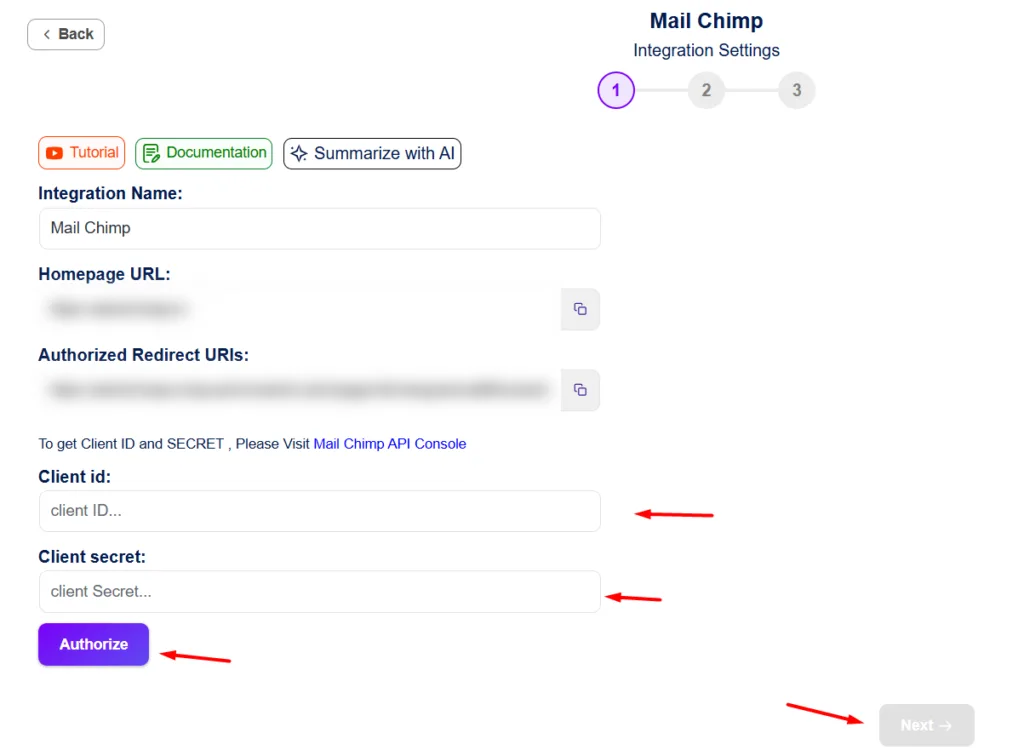
Click Add Action and search & select your destination platform, for example: HubSpot, Mailchimp, Google Sheets, Telegram, or any of the 173+ available options.

Each platform requires authentication, usually an API key or OAuth login. Once connected, Bit Integrations automatically loads the available fields from that platform.
Opmerking: You can find all kinds of integration setup processes in the Bit Integrations documentatie.
From the EA Login | Register Form, Bit Integrations can capture:
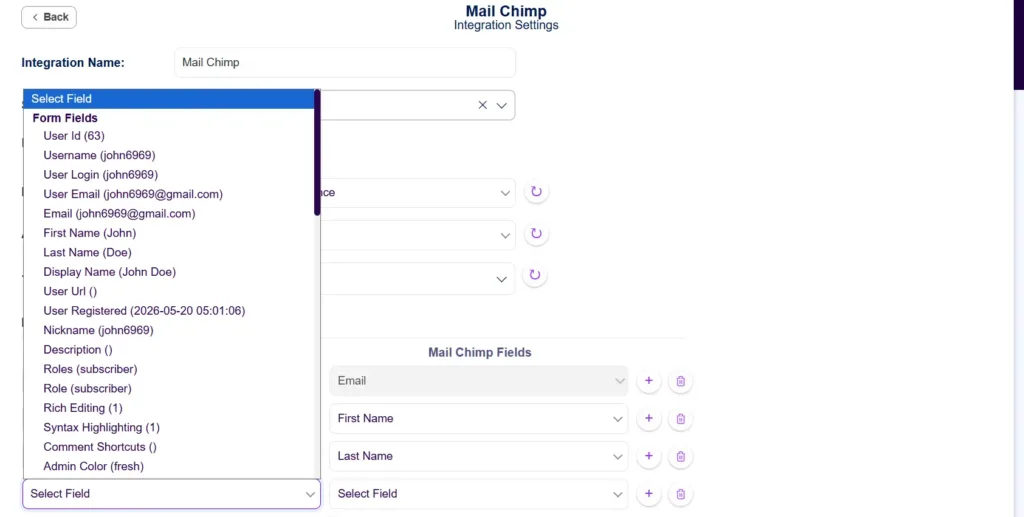
All of these are available as mappable fields inside the Bit Integrations interface. No custom code needed to expose them.
First, select the target list, audience, or sheet you want to send the data to. Then match the EA form fields to your destination platform’s fields. At a minimum, map the Email field. Name, username, and timestamp fields are optional but recommended.
If you need more control, use voorwaardelijke logica to filter which submissions trigger the action based on specific criteria.
Click Save. Submit a test registration or login through your EA form and verify that the data arrives at your destination platform.

Here are four practical ways teams use this integration.
When someone registers, their contact details go straight into HubSpot, no manual import, no CSV exports. You can map the email, name, and any other available fields to HubSpot contact properties.
From there, HubSpot handles the rest: lead scoring, deal creation, and enrollment into sequences.
Useful for: sales teams managing inbound leads from a membership or course site.
Ontdek meer over Essential addons to HubSpot integration, and all events.
Push the registrant’s details into a specific Mailchimp audience the moment they sign up. They can be tagged, assigned to a segment, or automatically enrolled in a welcome sequence, all handled by Mailchimp after Bit Integrations delivers the data.
Useful for: newsletters, onboarding drips, product announcement lists.
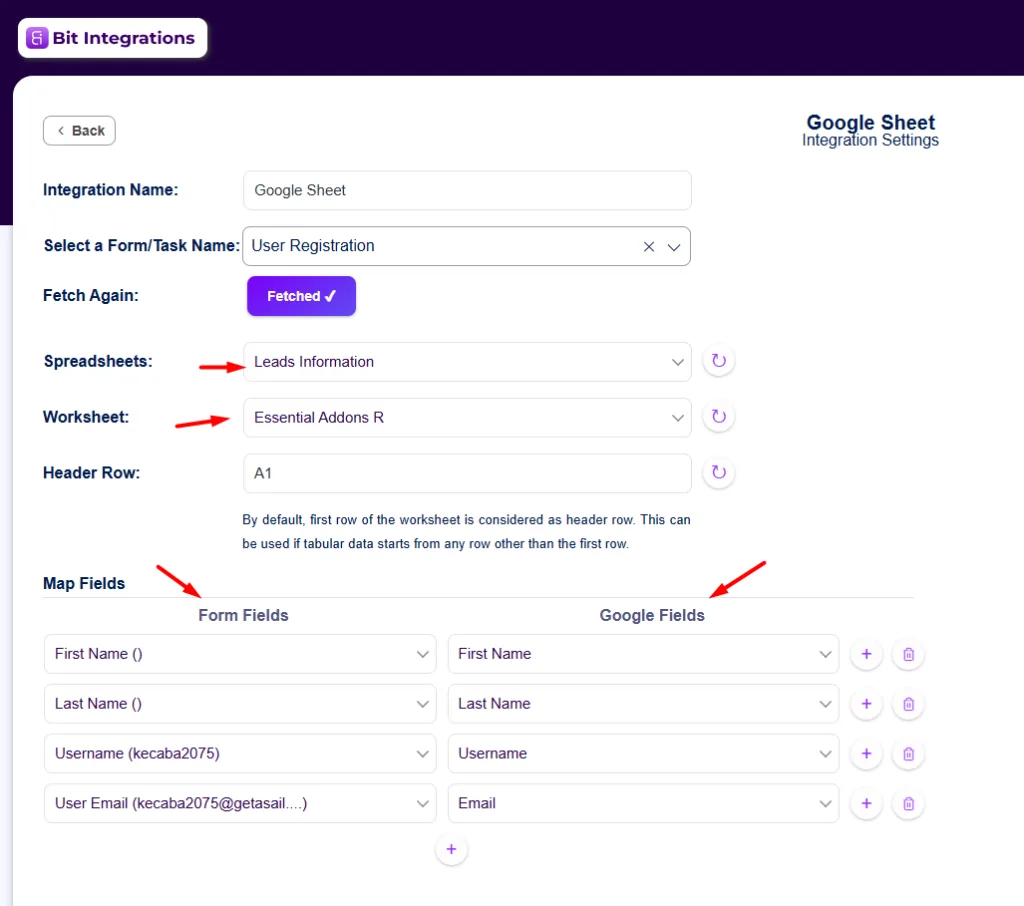
Each registration or login appends a new row to a Google Sheet, including email, name, timestamp, and any other mapped fields. It’s a straightforward audit trail that anyone on the team can access without needing WordPress access.
Useful for: reporting, manual review workflows, tracking signups over time.
Send a Telegram message to a channel or group the moment someone registers. The message can include the user’s name, email, and registration time. The team sees it immediately without checking WordPress or waiting for a daily report.
Useful for: high-intent lead follow-up, community management, and sales teams working in shifts.
Essential Addons handles the form, clean, visual, and no-code. Bit Integrations handles what happens after submission, routing that data to wherever your workflow lives. With supported platforms as actions, the same two triggers (User Registration and User Login) cover a wide range of real-world scenarios.
If you want to go further, the Bit Integrations documentation covers the full list of supported platforms and field mapping options for each one.
Yes. The Login | Register Form widget is available in the free version of Essential Addons, and Bit Integrations works with it.
Two events: User Registration and User Login. Each can be set up as a separate integration with different actions and destinations.
Yes. One EA trigger can fire multiple actions simultaneously, for example, adding a contact to Mailchimp and logging the same data to Google Sheets at the same time. You will need to create a separate integration for each destination
Yes. The trigger fires only on actual form submission, registration, or login. No data is sent unless the form is completed and submitted successfully.
Yes. Bit Integrations supports conditional logic, so you can restrict the action to submissions that meet specific criteria, for example, only sending data when a certain field has a particular value.
Yes. Bit Integrations keeps a log of each triggered integration, so you can confirm whether the data was delivered successfully or troubleshoot if something failed.