Webhooks in Bit Integrations: No More Platform Limitations
TL;DR: 60-Second Webhook Breakdown
Bit Integrations supports two types of webhooks: Incoming (receive data from external apps into WordPress) and Outgoing (send data from WordPress to external apps). Both work without any coding.
- Incoming webhooks let any external app (JotForm, Google Forms, custom APIs) send data directly into a WordPress workflow.
- Outgoing webhooks support 8 HTTP methods (GET, POST, PUT, PATCH, DELETE, OPTION, TRACE, CONNECT) and 4 content types (application/json, multipart/form-data, application/x-www-form-urlencoded, raw JSON)
- Webhooks in Bit Integrations are unlimited, with no monthly send caps
- Webhooks bypass the need for native integration support, connecting platforms not in Bit Integrations’ 374+ directory
- Setup requires no coding, paste a URL, map fields, and click Save
Who this is for: WordPress site owners, WooCommerce store managers, marketers, and developers who need to connect tools not natively supported in Bit Integrations.
Every WordPress automation setup eventually hits the same wall: a tool you rely on isn’t natively supported.
Maybe it’s a custom-built CRM your company developed in-house. Maybe it’s a niche SaaS platform with a small user base. Or maybe it’s a newer tool that hasn’t made it into any integration directory yet. Whatever the case, the result is the same: your data is stuck, and your workflow breaks.
Bit Integrations solves this with webhooks: a way to send and receive data between your WordPress site and virtually any platform on the internet, regardless of whether it appears in the native integration list.
This guide explains exactly how webhooks work in Bit Integrations, when to use each type, how to configure them fully (including HTTP methods and content types), and real-world use cases where they replace the need for custom API development.
What Is a Webhook? (And How It Differs from an API)
Before diving into setup, it helps to understand what makes webhooks different from standard API integrations, because the difference directly affects your workflow’s speed and reliability.
An API integration is pull-based. Your system sends a request to an external platform asking, “Do you have any new data?” This happens on a schedule or on demand. If nothing has changed, the request is wasted. If the external platform has rate limits, you can hit them quickly during high-volume periods.
A webhook is push-based. The external platform sends data to your system the moment an event occurs. No polling. No waiting. No wasted requests.
| Attribute | API Integration | Webhook |
|---|---|---|
| Data flow | Your system requests data | External system pushes data |
| Timing | Scheduled or on-demand | Real-time, event-triggered |
| Rate limits | Yes, can throttle workflows | No, fires once per event |
| Setup complexity | Higher, requires auth, endpoints, parsing | Lower, paste a URL, map fields |
| Best for | Bulk syncs, scheduled reports | Instant triggers, live data |
For most real-time automation scenarios, a form submission, a new order, a user registration, webhooks are faster and more efficient than API polling.
Incoming vs Outgoing Webhooks: What’s the Difference?
Bit Integrations supports incoming and outgoing webhook communication in both directions.
| Attribute | Incoming Webhook | Outgoing Webhook |
|---|---|---|
| Direction | External app to WordPress | WordPress or received webhook data to the external app |
| What it does | Receives data from a third-party tool into your WordPress workflow | Sends data from a webhook or WordPress plugin event to an external platform |
| Use when | Your form tool, CRM, or SaaS app isn’t natively supported but can send webhooks | You want to push webhook or WordPress data to an unsupported platform |
| Example | JotForm submission to Google Sheets via Bit Integrations | WooCommerce order to Custom CRM |
Both types require zero coding. Both are unlimited in Bit Integrations with no monthly send caps.
Incoming Webhooks: Receive Data from Any External App
An incoming webhook gives your WordPress site a unique URL. Any external application that supports webhook output, forms, CRMs, payment tools, and SaaS apps can send data to that URL. Bit Integrations receives the payload, parses it, and routes it to any of its 374+ supported platforms.
This means even if your preferred trigger tool isn’t in Bit Integrations’ native list, you can still use it as a data source.
How to Set Up an Incoming Webhook
Incoming webhook setup is easier than you think. If your required app isn’t natively supported in Bit Integrations, you can still bring its data into WordPress using Incoming Webhooks.
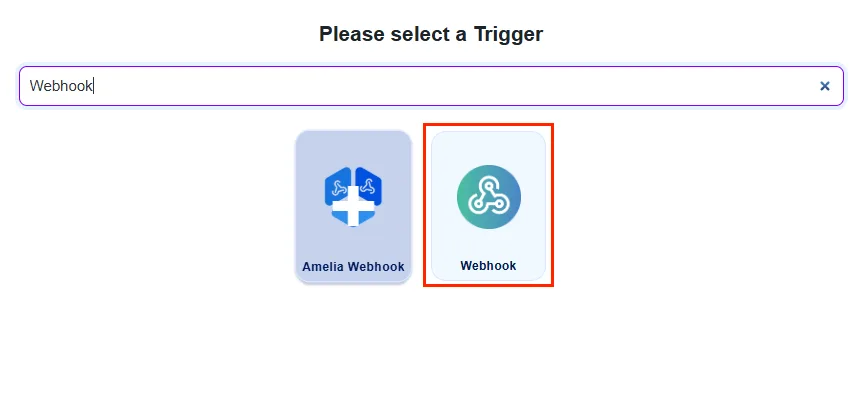
Step 1 – Create Integrations:
From your WordPress dashboard, go to Bit Integrations → Create New Integration and select Webhook as your trigger.
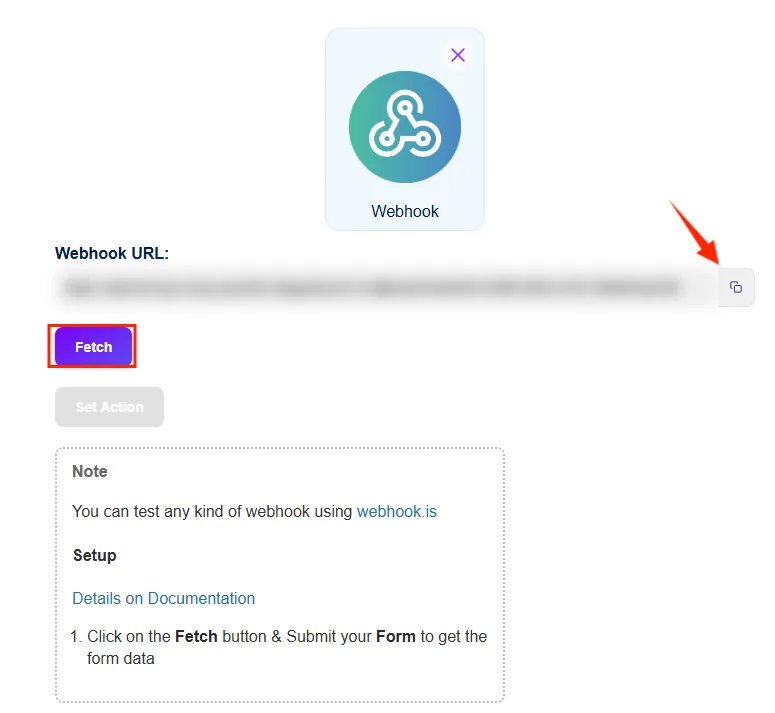
Step 2 – Generate and Copy the Webhook URL
Bit Integrations automatically generates a unique webhook URL for your integration. Copy it using the copy icon, then click the Fetch button. This puts Bit Integrations into listening mode, ready to capture a sample payload from your external app.
Step 3 – Send a Test Request from Your External App
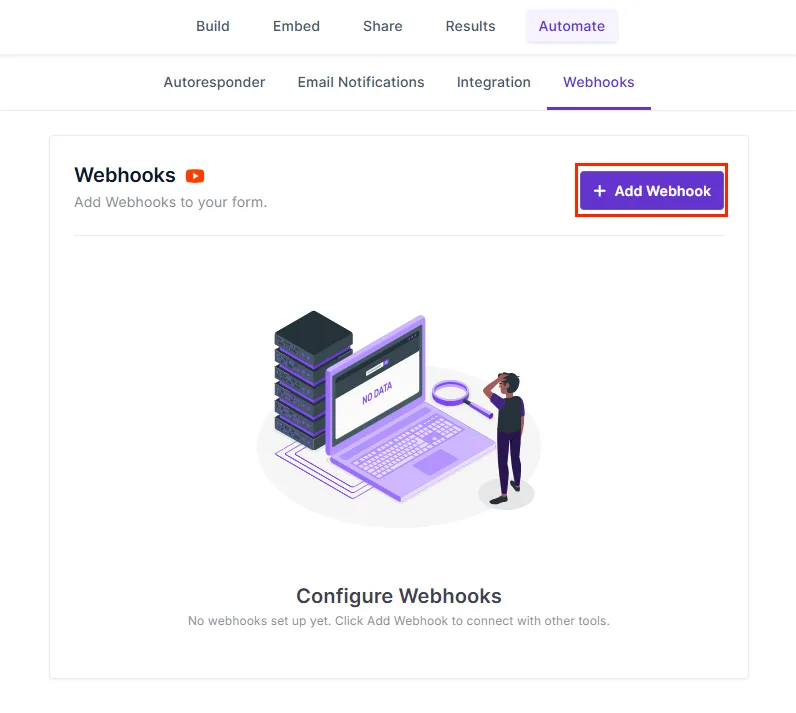
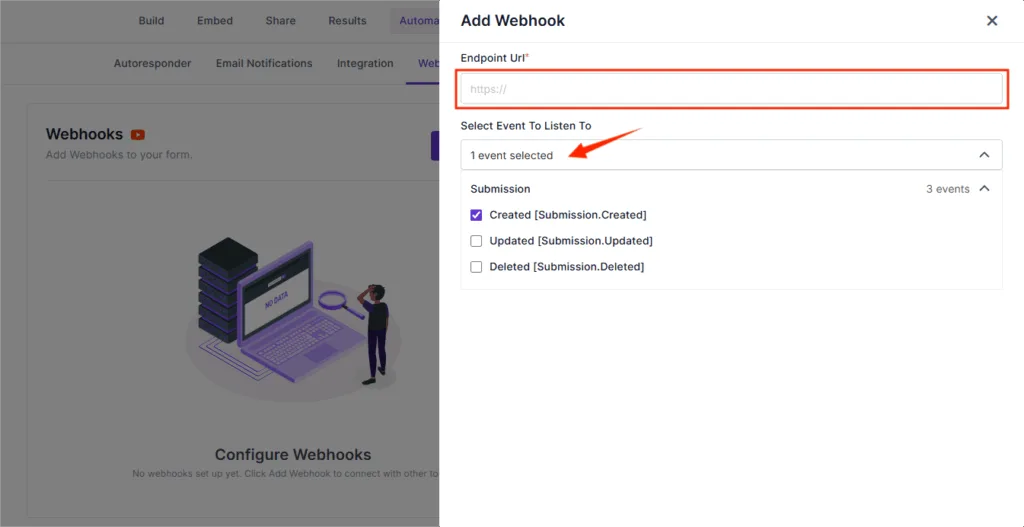
Go to your external tool (JotForm, Formester, Google Forms, or any webhook-capable app) and locate its webhook settings. Paste the Bit Integrations URL as the destination, then submit a test entry. This sends sample data so Bit Integrations can detect the field structure for mapping.
Step 4 – Authorize Your Action Platform
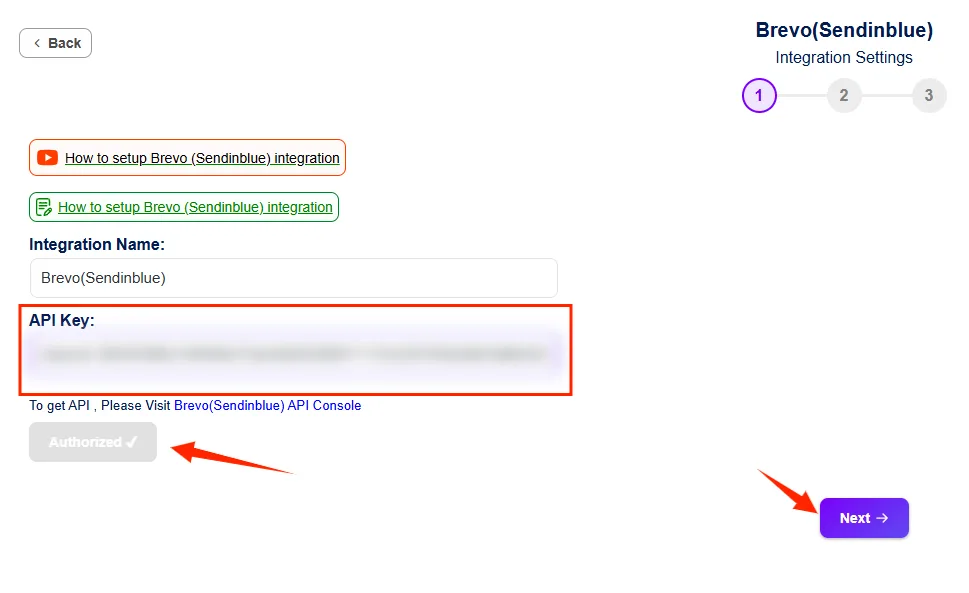
Once the sample data arrives, Bit Integrations displays all captured fields. Now select your action platform, Google Sheets, MailPoet, Brevo, or any of the 374+ supported platforms, and enter the required API credentials, and click Authorize.
Step 5 – Map Webhook Data between Your Desired App
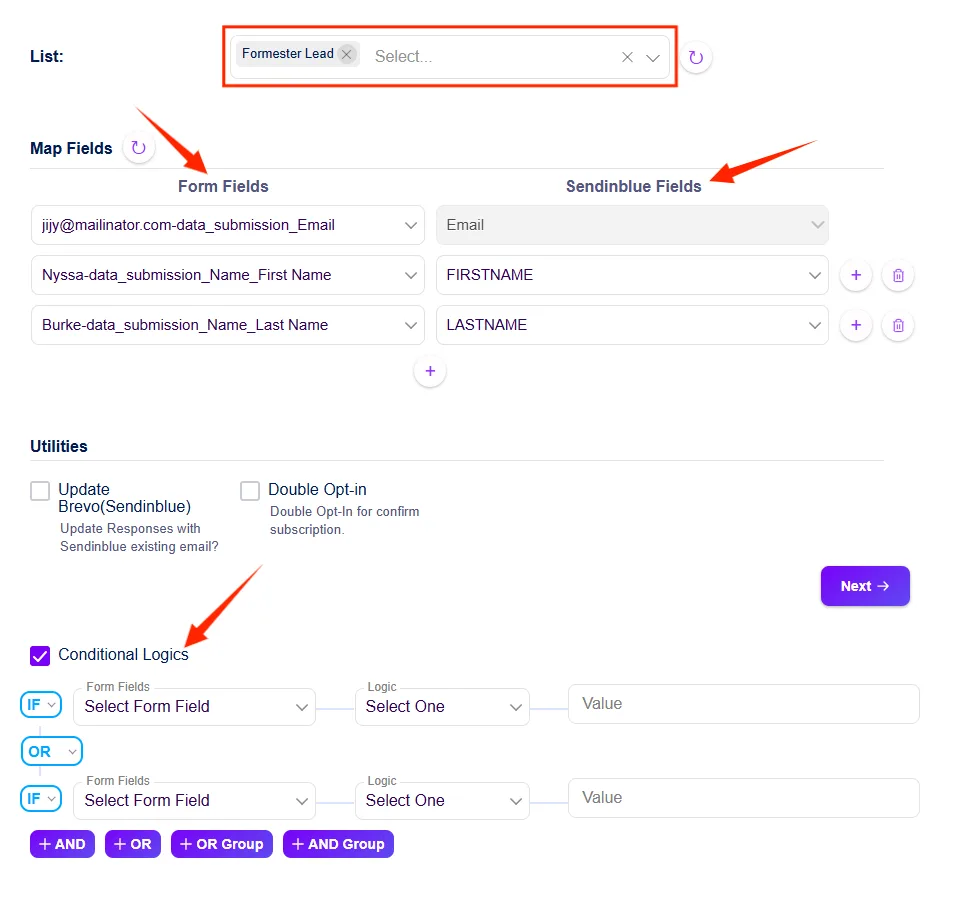
Map each incoming data field to the corresponding field in your action platform. For example, map the “Email” field from your JotForm submission to the “Email” column in Google Sheets.
You can also enable conditional logic at this step to filter data before it’s sent, for example, only route leads with a specific email domain to your CRM or only send high-value form responses to a premium list.
Click save and finish. Your incoming webhook is live.
Real-World Use Case
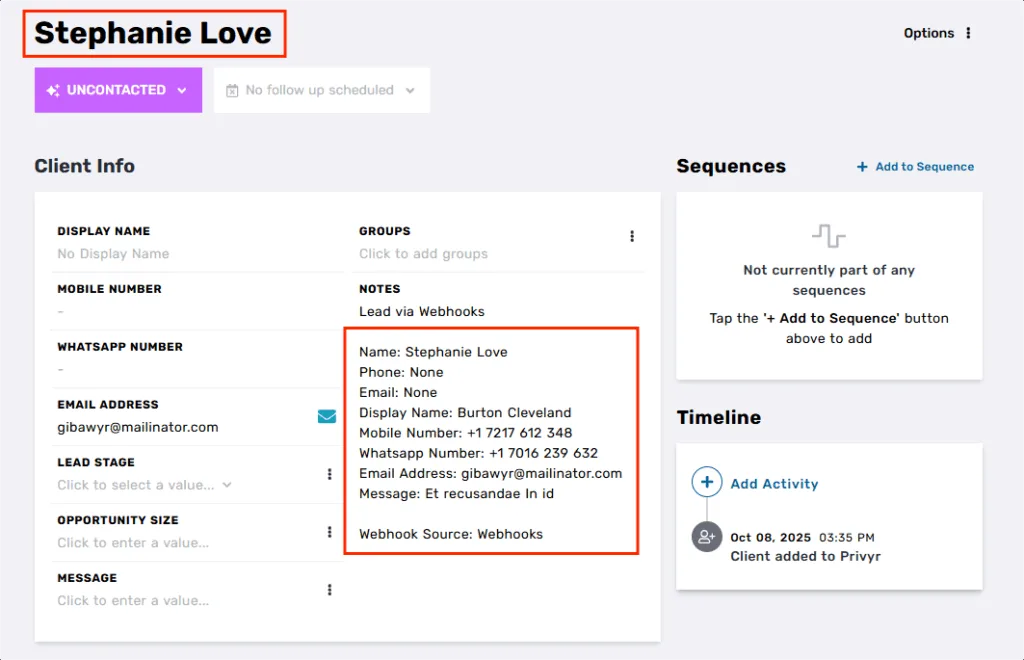
A marketing team uses Formester (a SaaS form builder not natively supported in Bit Integrations) to collect event registrations. Using an incoming webhook, every new submission is automatically captured by Bit Integrations and pushed to Google Sheets for tracking and MailPoet for a follow-up email sequence, with no manual imports and no developer involvement.
Outgoing Webhooks: Send WordPress & Webhook Received Data to Any External App
An outgoing webhook fires whenever a specified event occurs in a WordPress plugin, a form submission, a WooCommerce order, or a user registration. It sends that event’s data to any external URL you specify, including custom-built CRMs, analytics tools, or platforms outside the Bit Integrations directory.
Full Request Configuration Options
This is where Bit Integrations gives you significantly more control than most WordPress automation tools. The outgoing webhook configuration includes three tabs and multiple format options:
- Params Tab: Add URL query parameters that get appended to the endpoint URL. Useful for APIs that require authentication tokens or identifiers passed via the URL string (for example,
api_key=abc123&source=wordpress). - Headers Tab Set custom HTTP headers for the request. This is where you add authorization headers (
Authorization: Bearer YOUR_TOKEN), content negotiation headers, or any custom headers required by the receiving API. - Body Tab: Control the structure and format of the request payload. Bit Integrations supports four content types:

| Content Type | When to Use |
|---|---|
application/json | Standard for modern REST APIs, the most common choice |
multipart/form-data | Required for file uploads or legacy form-based APIs |
application/x-www-form-urlencoded | Standard HTML form POST format, used by older APIs |
application/json (raw body) | When manually writing a custom JSON payload |
Toggle Send All Data to push the entire trigger payload to the destination without manually mapping individual fields. Useful for quick setups or when the receiving system accepts a complete data object.
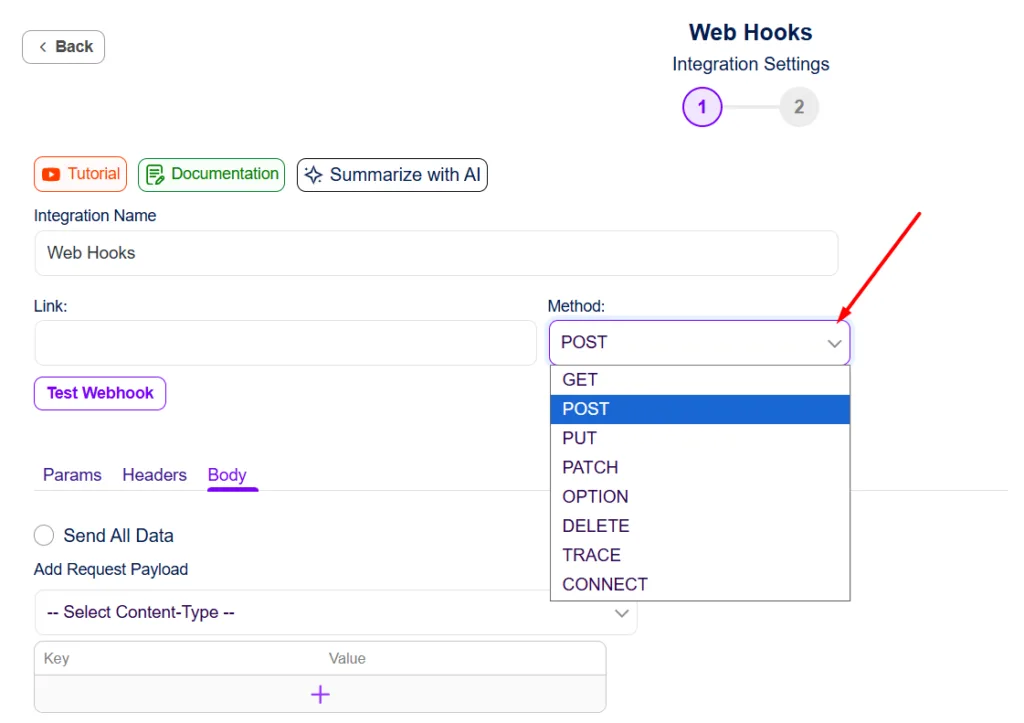
Supported HTTP Methods
Bit Integrations supports eight HTTP methods for outgoing webhooks, giving you compatibility with virtually any API architecture:
| Method | Typical Use |
|---|---|
| POST | Create a new record (default for most webhooks) |
| GET | Retrieve data or trigger a read action |
| PUT | Replace an entire existing record |
| PATCH | Update specific fields of an existing record |
| DELETE | Remove a record in the external system |
| OPTION | Pre-flight request for CORS-enabled APIs |
| TRACE | Diagnostic/debugging requests |
| CONNECT | Tunnel connections (advanced use cases) |
Most third-party integrations use POST, but if you’re connecting to a REST API that requires PUT for updates or PATCH for partial edits, Bit Integrations handles it natively.
How to Set Up an Outgoing Webhook
Setting up and Outgoing Webhook is easier than you think. Just follow the step-by-step guide:
Step 1 – Choose your WordPress plugin as a trigger
Start by heading to Bit Integrations → Create New Integration from your Bit Integrations dashboard.
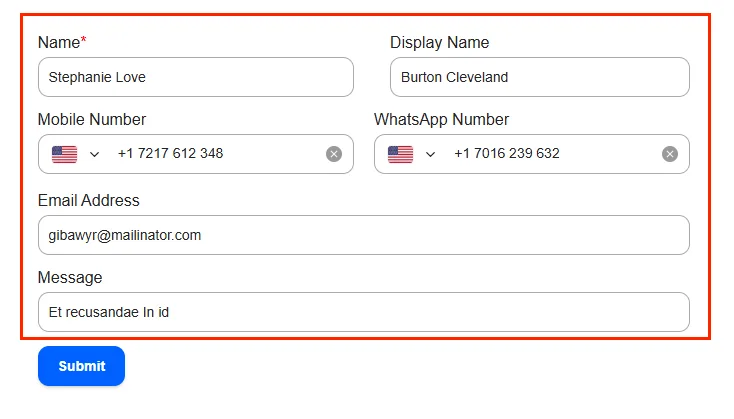
Here, select your preferred WordPress plugin as the trigger, for example, Bit Form, WPForms, Contact Form 7, WooCommerce, or any of the supported plugins. And go to the next step.
Whenever an event occurs (like a form submission or order completion), it will automatically trigger your outgoing webhook to send data to your desired app.
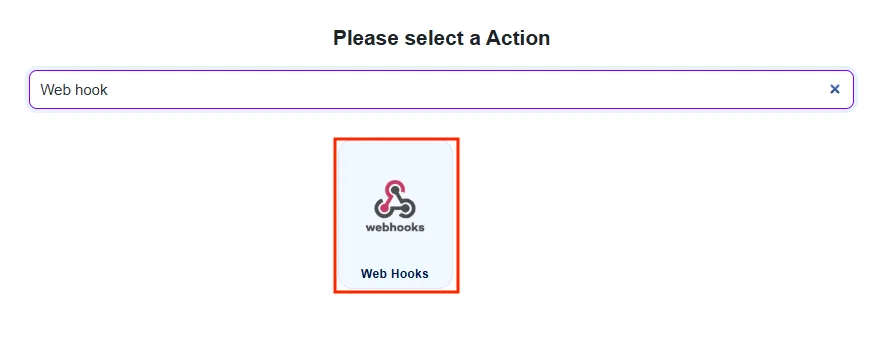
Step 2 – Select Outgoing Webhook as the Action
In the actions list, search and select Outgoing Webhook. This tells Bit Integrations to send data from the trigger event to an external URL.
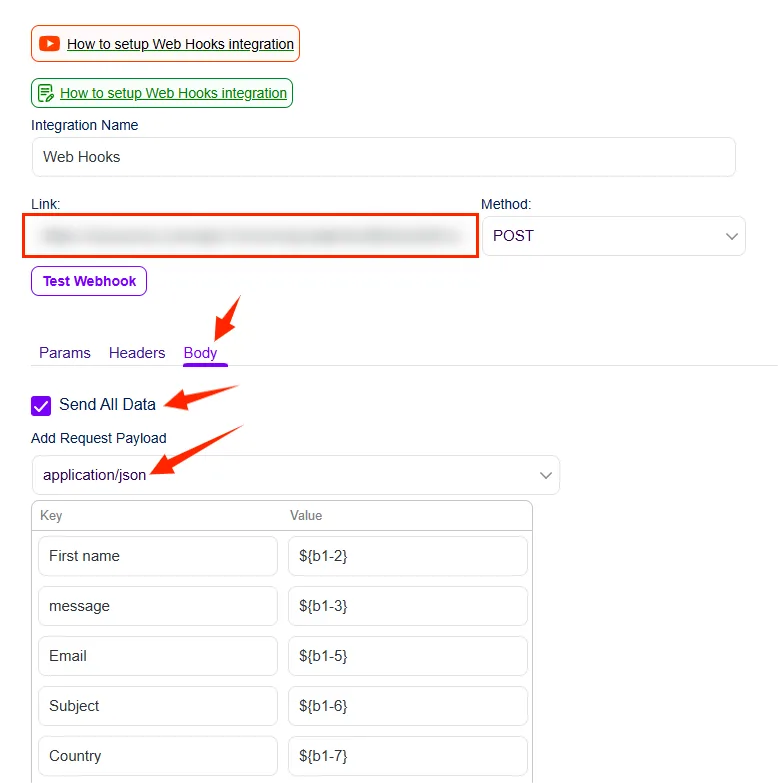
Step 3 – Configure the Request
Enter the webhook endpoint URL of your target platform. This is the destination where Bit Integrations sends the data. You can find it in your external app’s settings or API documentation.
Then configure the request:
- Select the HTTP Method (POST is standard for most platforms)
- Open the Body tab and choose your Content Type
- Toggle Send All Data if you want to send the full payload, or map individual fields manually
- Add any required Headers (API keys, auth tokens) in the Headers tab
- Add Params if your target URL requires query parameters
Step 4 – Test your outgoing webhook integrations
Click Test Webhook to send a live request to your endpoint. Bit Integrations will confirm whether the connection succeeded. Then trigger a real event in your WordPress plugin (submit a form, place a test order) and verify the data arrives correctly in your external platform.
Click Save. Your outgoing webhook is active.
Real-World Use Case
An e-commerce store uses a proprietary inventory management system that isn’t in any integration directory. Using an outgoing webhook in Bit Integrations, every WooCommerce order automatically sends a POST request with order details (customer name, product SKU, quantity, shipping address) to the inventory system’s API endpoint
Formatted as application/json, authenticated via a Bearer token in the Headers tab. The inventory updates in real time without any manual input or custom development.
Why Unlimited Webhooks Matter
Most integration platforms cap the number of webhook sends per month, then require a plan upgrade when you hit the limit. This creates unpredictable costs and workflow disruptions during high-traffic periods.
Bit Integrations includes unlimited webhook sends at no additional cost, no monthly caps, no throttling, and no upgrade prompts. For businesses running high-volume WooCommerce stores, active lead generation campaigns, or multi-platform data pipelines, this removes a significant operational constraint.
When to Use Webhooks vs. Native Integrations
Webhooks in Bit Integrations are not a workaround; they’re a deliberate feature for cases native integrations can’t cover. Here’s a quick guide on when each makes sense:
| Scenario | Use |
|---|---|
| Your platform is in the Bit Integrations directory | Native integration, simpler setup, easy-mapped fields |
| Your platform supports sending webhooks, but it isn’t in the directory | Incoming webhook |
| Your platform has an API endpoint that accepts POST/PUT requests | Outgoing webhook |
| You need full control over the HTTP method and content type | Outgoing webhook |
| You’re integrating a custom-built internal tool | Outgoing webhook |
| You want data to move instantly between systems without scheduled API requests | Incoming or Outgoing, pick based on direction |
Conclusion:
Webhooks in Bit Integrations remove the hard boundary between “supported” and “unsupported” platforms. Incoming webhooks turn any webhook-capable external tool into a valid data source for your WordPress workflows.
Outgoing webhooks turn any WordPress plugin event into a trigger that can reach any API endpoint, with full control over HTTP method, content type, authentication headers, and payload structure.
The result is a WordPress automation setup that isn’t limited by any integration directory. If a platform can send or receive data over HTTP, Bit Integrations can connect to it.
Frequently Asked Questions
What is an incoming webhook in Bit Integrations?
An incoming webhook is a unique URL generated by Bit Integrations that external applications can send data to.
What is an outgoing webhook in Bit Integrations?
An outgoing webhook sends data from a WordPress plugin event (a form submission, WooCommerce order, or user registration) to an external application’s API endpoint. Bit Integrations supports 8 HTTP methods and 4 content types, giving full control over how data is formatted and delivered.
For outgoing webhooks, does Bit Integrations support sending custom headers from the trigger source?
Yes! Bit Integrations supports custom headers, query parameters, and dynamic data mapping.
Do I need coding knowledge to set up webhooks in Bit Integrations?
No. Both incoming and outgoing webhooks are configured through a visual interface: paste a URL, select a method, map fields, and save. No custom code is required at any step.
Does Bit Integrations limit how many webhooks I can send?
No. Bit Integrations does not impose monthly caps on webhook sends. Unlimited outgoing requests are included across all plans.
What HTTP methods does the outgoing webhook support?
Bit Integrations supports GET, POST, PUT, PATCH, DELETE, OPTION, TRACE, and CONNECT, covering the full range of standard REST API methods.
What content types can I send with an outgoing webhook?
Four content types are supported: application/json, multipart/form-data, application/x-www-form-urlencoded, and raw (JSON).
Can I add authentication headers to outgoing webhooks?
Yes. The Headers tab in the outgoing webhook configuration lets you add any custom headers, including Authorization: Bearer TOKEN, API keys, or content negotiation headers required by the receiving platform.
Can I filter which data gets sent through a webhook?
Yes. Bit Integrations supports Conditional Logic on both incoming and outgoing webhooks. You can set conditions that control when data is sent, for example, only route a lead to your CRM if the budget field exceeds a certain value, or only push WooCommerce orders where the total is above a threshold.

Related Blog
Best Gravity Forms Copper CRM Integration tools in 2026

Gravity Forms Trello Integration Without Gravity Forms Pro (Save $100+)