

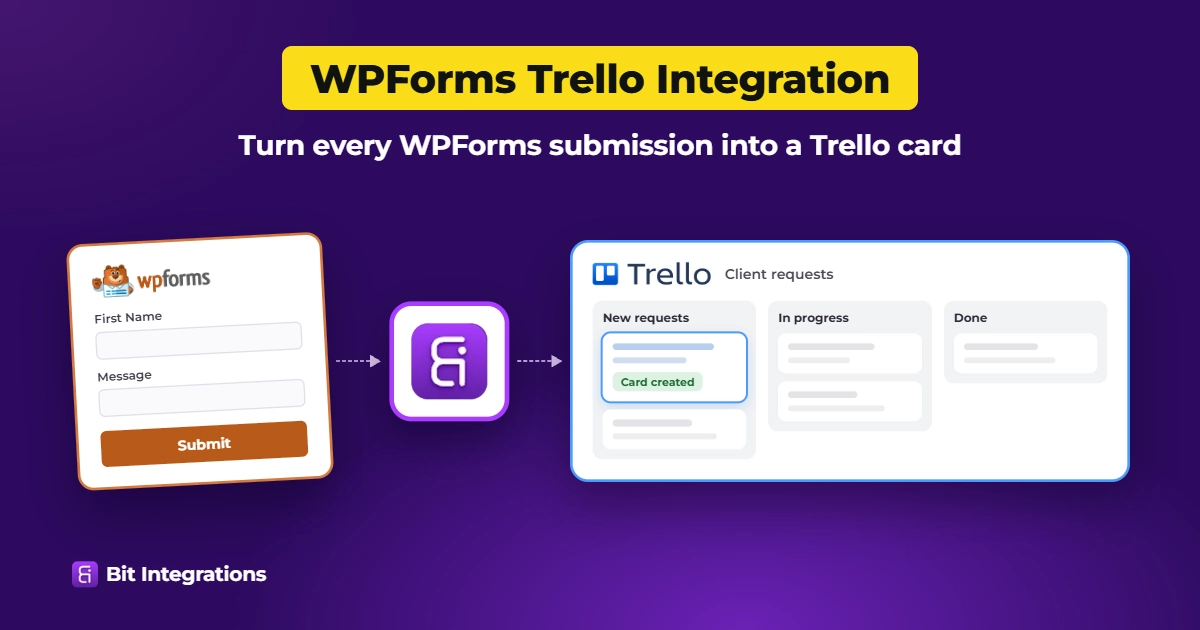
WPForms Trello Integration for Free: Create Trello Cards Via Form Submissions
TL;DR
- Native integration: WPForms has no built-in Trello integration. You need a connector between the two.
- WPForms Pro or higher: The WPForms Zapier and Make add-ons can send form entries to Trello.
- Any WPForms plan, including Lite: The free version of Bit Integrations creates a Trello card from each new submission. Trello’s email-to-board address also works for simple cards.
- Trello plan: Trello Free covers the card name, description, and date. Trello Custom Fields need Trello Standard or higher.
- Setup: Select WPForms as the trigger and Trello as the action, authorize Trello with a Client ID from Trello’s Power-Up Admin Portal, then map your form fields to card fields.
You can turn WPForms submissions into Trello cards automatically, but WPForms and Trello don’t connect on their own.
This guide explains which connection method fits your WPForms plan. It then walks you through a hands-on setup to create a Trello card from a WPForms contact form using the free version of Bit Integrations.
Can WPForms Integrate With Trello?
Not directly. WPForms doesn’t offer a Trello add-on, and the WPForms Trello integration page routes entries through Zapier.
To send submissions to Trello, you need a tool that detects each new WPForms entry and creates a card through Trello’s API or Trello’s email-to-board address.
Your WPForms license decides which tools you can use, because WPForms sells its Zapier and Make add-ons as paid features.
Which Method Works With Your WPForms Plan
The free version of Bit Integrations and Trello’s email-to-board feature work with every WPForms plan, including WPForms Lite. So you can connect any WPForms plan to Trello through Bit Integrations for free. Not only Trello, but you can also connect WPForms Lite to ClickUp, Notion, and even more project management tools for free. But the Zapier and Make add-ons need WPForms Pro or higher.
Explore events that you can automate while connecting WPForms with Trello
| Method | WPForms plan | Also required | Trello plan | What you control on the card |
|---|---|---|---|---|
| Bit Integrations (free version) | Lite or any paid plan | A Trello app for authorization | Free | Name, description, date, position (Custom fields but needs Trello Pro) |
| Zapier addon | Pro or higher | Zapier account, site on HTTPS | Free | Fields in Zapier’s Trello action |
| Make addon | Pro or higher | Make account | Free | Fields in Make’s Trello modules |
Zapier’s free plan includes 100 tasks a month with two-step Zaps, and Make’s free plan includes 1,000 credits a month. Either can handle low volumes once you have WPForms Pro.
Before You Start
You need four things in place:
- A WordPress site on HTTPS with WPForms installed and at least one published form. Trello’s app form requires an HTTPS address.
- The free version of Bit Integrations, installed and activated from Plugins > Add New.
- A Trello account with the destination board and list already created. Bit Integrations loads existing boards and lists; it doesn’t create them.
- Permission to create an app in a Trello Workspace through the Power-Up Admin Portal.
Example used in this guide: a WPForms Simple Contact Form. Each submission becomes a Trello card. The visitor’s first name becomes the card name, the message becomes the description, and a date field sets the card date.
How to Create WPForms Trello Integration for Free With Bit Integrations
The setup has seven steps: five in Bit Integrations, one in Trello, and a test submission. Keep Bit Integrations and Trello open in separate browser tabs, because you copy values between them.
Step 1: Select WPForms as the trigger and choose your form.
In your WordPress dashboard, open Bit Integrations and click Create Integration. On the Please select a Trigger screen, search for WPForms and select it.
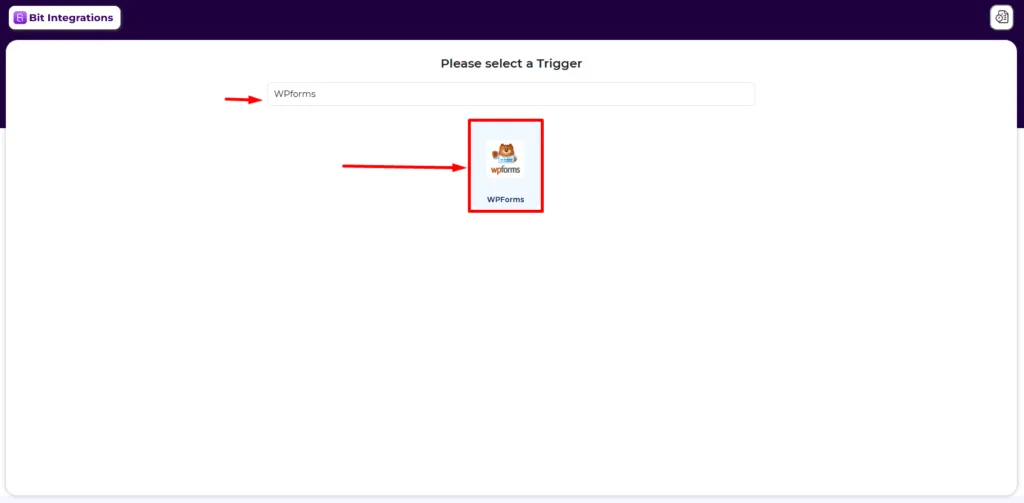
Under Select a Form/Task Name, choose the form that should create Trello cards, then click Next.

Step 2: Select Trello as the action.
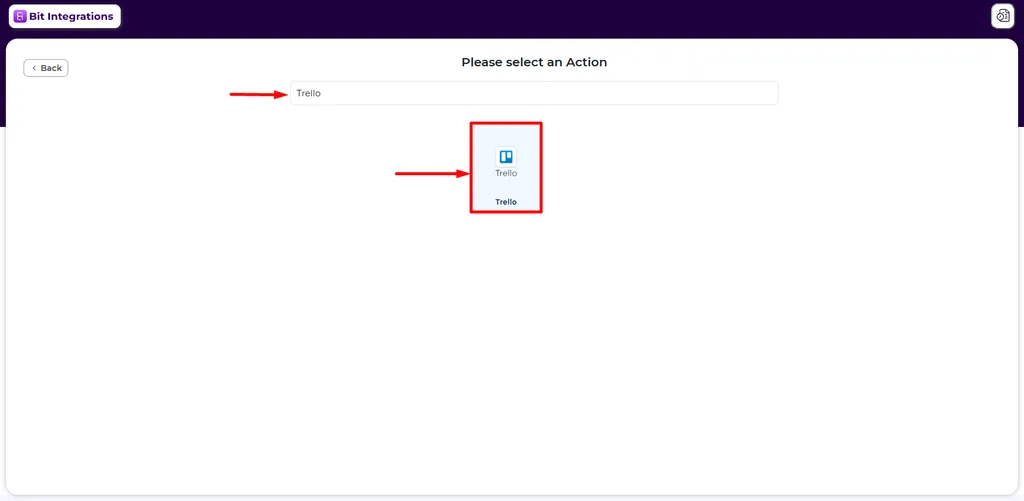
On the Please Select an Action screen, search for Trello and select it.
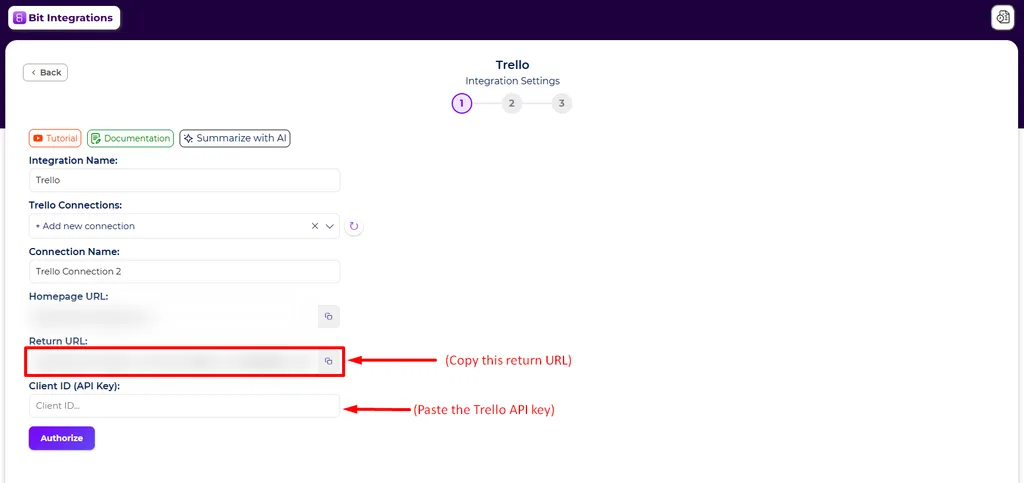
Step 3: Start a Trello connection in Bit Integrations.
The Integration Settings screen opens. Complete it in this order:
- Integration Name: a name you’ll recognize later, such as Contact form to Trello.
- Trello Connections: Choose + Add new connection. If you’ve connected Trello before, select the saved connection and skip to Step 6.
- Connection Name: a label for this Trello account.
- Homepage URL and Return URL: copy both with their copy buttons. You’ll paste them into Trello in Step 4.
Leave this screen open. You’ll return to it to paste the Client ID.
Step 4: Create a Trello app and copy its Client ID
Bit Integrations connects to Trello through an app you create in Trello’s Power-Up Admin Portal. That app’s Client ID is the API key Bit Integrations asks for. For more details, you can read our official documentation about Trello integration.
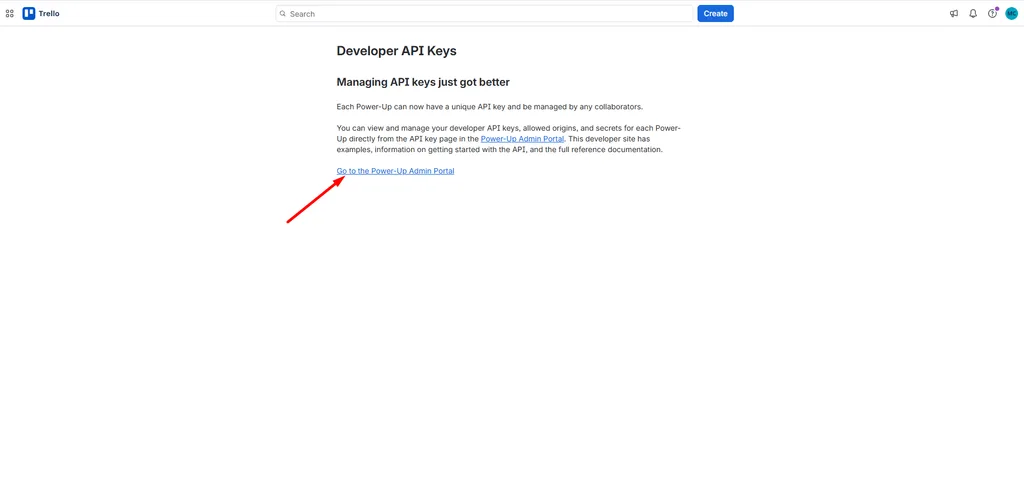
- Open trello.com/app-key while logged in to Trello, then click Go to the Power-Up Admin Portal.
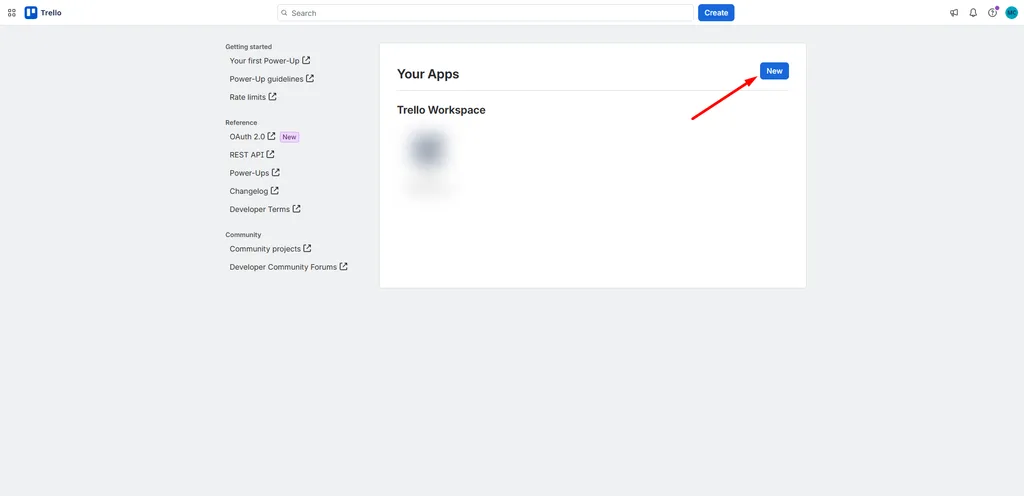
2. Under Your Apps, click New.
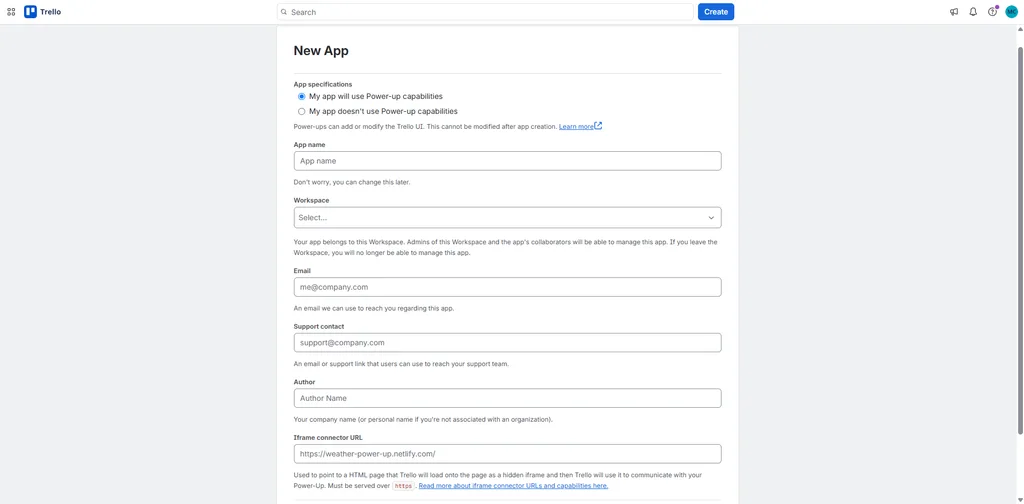
3. In the New App form, enter an App name, choose the Workspace, and fill in Email, Support contact, and Author. Paste the Homepage URL from Bit Integrations into the Iframe connector URL, then create the app.
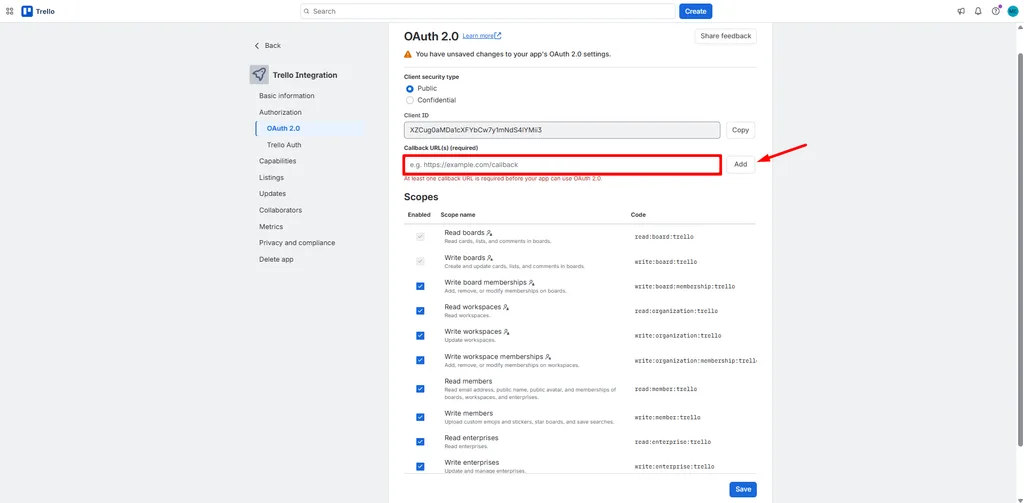
4. In the app’s menu, open Authorization > OAuth 2.0. Paste the Return URL from Bit Integrations into Callback URL(s) and click Add.
5. Under Scopes, enable every scope in the list. Read boards and Write boards are already on.
6. Click Save, then copy the Client ID.
Step 5: Authorize Trello in Bit Integrations
Return to the Bit Integrations tab. Paste the Client ID into Client ID (API Key) and click Authorize. Approve access when Trello asks, then click Next once authorization succeeds.
Step 6: Choose the board and list, then map fields.
Select the destination board under Boards and the list under Lists. If a board or list you just created is missing, click the refresh icon beside the dropdown.
In Field Map, the left column holds WPForms fields and the right column holds Trello card fields. Trello requires a card name, so always map Name. Click + to add more rows.
| WPForms field | Trello field |
|---|---|
| First Name | Name (required) |
| Comment or Message | Description |
| Date (dd/mm/yyyy) | Date |
If your board uses Trello Custom Fields, map them under Custom Field Map. Custom Fields require Trello Standard or higher.
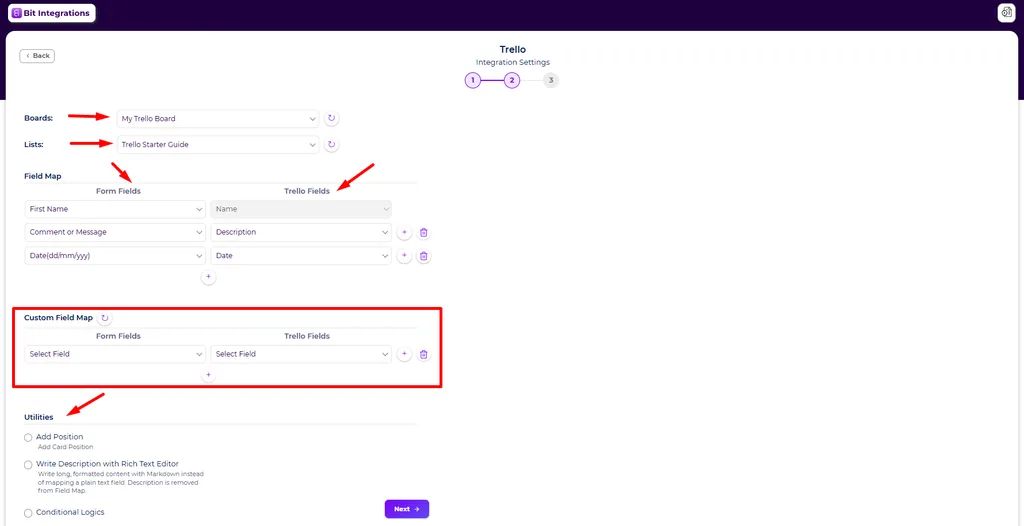
Under Utilities, three options are available:
- Add Position: places new cards at the top or bottom of the list.
- Write Description with Rich Text Editor: replaces the mapped Description with formatted text you write in Markdown.
- Conditional Logic: sends only submissions that match your rules, such as entries where a dropdown equals Support.
Click Next, then save and finish the integration.
Step 7: Submit a test entry and check the Trello card.
Open the page with your form, fill it in, and submit it. Then open the Trello list you selected. The new card should show the mapped name, description, and date.

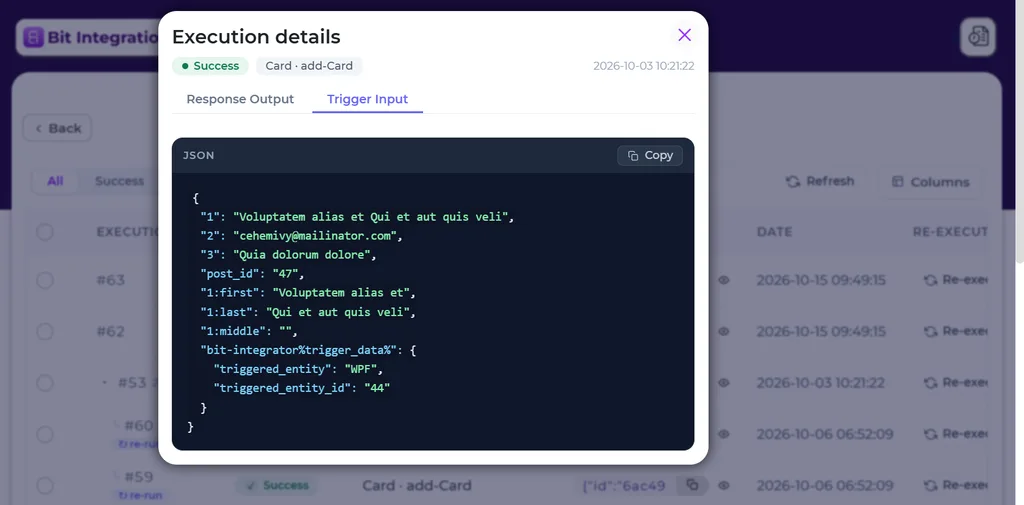
If no card appears, open the integration’s timeline in Bit Integrations. It records each run as a success or an error, and you can re-run a failed submission there after fixing the cause.
Limitations and Troubleshooting
Limitations
- New submissions only: the integration runs when someone submits the form, so entries collected before setup aren’t sent.
- Runs during submission: Bit Integrations creates the card while WordPress processes the submission, with no queue. A failed Trello request appears in the timeline.
- Trello Free limits: Trello Free allows up to 10 boards and 10 collaborators per Workspace. Custom Fields start on Trello Standard.
- Creates cards only: each submission creates a new card. This setup doesn’t update existing cards.
Fixes for common problems
- Authorization fails: check that the Callback URL in Trello matches the Return URL exactly, that you clicked Add and then Save, and that you copied the Client ID from the OAuth 2.0 page.
- A board or list is missing: create it in Trello first, then click the refresh icon next to the dropdown. Confirm the board sits in a Workspace your Trello account can access.
- No card after a submission: read the error in the integration’s timeline, fix the cause, and re-run the failed entry.
- You want failure alerts: turn on email failure notifications in Bit Integrations before you create the integration.
Final Verdict
WPForms doesn’t connect to Trello on its own, so the right method depends on your WPForms license. If you pay for WPForms Pro or higher, the Zapier or Make add-on works within each platform’s free-plan limits.
If you use WPForms Lite, Basic, or Plus, the free version of Bit Integrations creates a Trello card from each submission inside WordPress, with no extra automation subscription.
Trello Free covers the card name, description, and date. Only custom fields require a paid plan. Submit one test entry and check the timeline before you rely on the integration.
Frequently Asked Questions
Does the free version of Bit Integrations work with WPForms Lite?
Yes. WPForms is one of the free triggers in Bit Integrations, and Trello is a free action. WPForms Lite and Trello Free work together without a paid plan on either side.
Can I send different submissions to different Trello lists?
Yes. Create one integration per list and add a conditional logic rule to each, for example, based on a dropdown field. Each submission then creates a card only in the list whose rule it matches.
Can Trello add labels or members to new cards automatically?
The Bit Integrations field map covers the card name, description, and date. To add labels or members, create a rule in Trello’s built-in automation that runs when a card is added to your list.
Can I reuse the same Trello connection for other integrations?
Yes. After you authorize Trello once, the connection appears in the Trello Connections dropdown. New integrations can select it instead of needing another Trello app.
What happens if Trello is unavailable when someone submits the form?
The run fails, and Bit Integrations records the error in the integration’s timeline. When Trello is reachable again, re-run the failed entry from the timeline.

Related Blog
Free WPForms Mailchimp Integration: Connect WPForms Lite and Basic to Mailchimp

WPForms HubSpot Integration Without Elite: Connect WPForms to HubSpot for Free